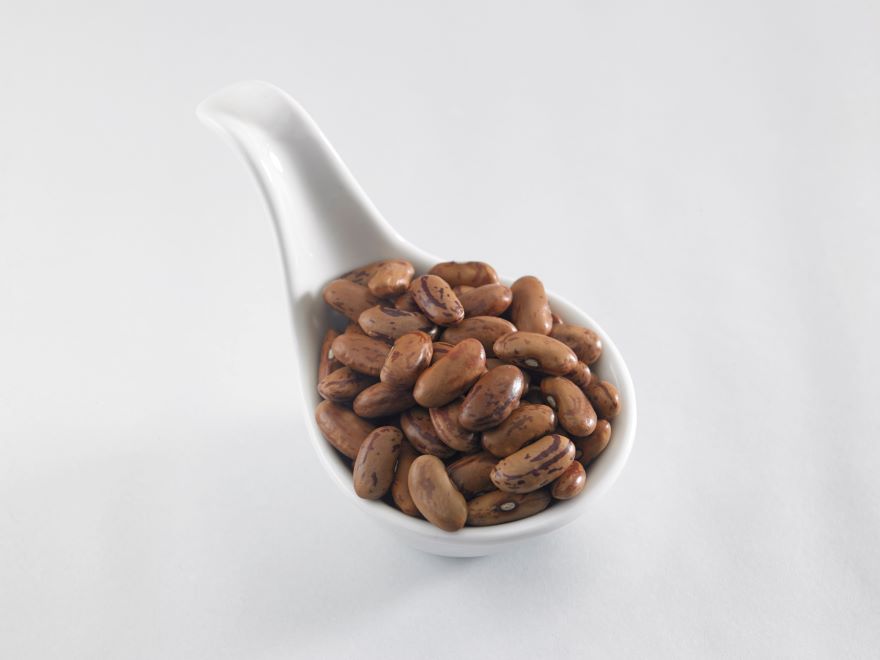
Growing pinto beans in your garden is both rewarding and economical. As a staple in many diets, pinto beans are a versatile plant that offers a bountiful harvest when given the right conditions. The success with pinto beans starts with choosing a location in your garden that receives ample sunlight and has well-draining soil. Ensuring your soil is rich in organic matter can significantly enhance plant health and bean production.

Caring for pinto bean plants involves regular watering, especially during dry periods, to keep the soil consistently moist but not waterlogged. As the plants grow, you also need to provide support for certain varieties to encourage upward growth and prevent diseases. Monitoring for pests and diseases is a consistent part of the process, as a proactive approach can save your crop from significant damage.
Key Takeaways
- Pinto beans thrive in a sunny location with organic-rich, well-draining soil.
- Consistent moisture and support are vital for healthy pinto bean plants.
- Proactive monitoring for pests and diseases is essential to protect the crop.
Selecting the Right Soil

Selecting appropriate soil is fundamental for the healthy growth of pinto beans, focusing on soil type and water management, pH optimization, and enhancing fertility with organic matter.
Give your pinto beans the VIP treatment from day one! A raised garden bed not only improves drainage but also gives you total control over your soil mix—ideal for beans that dislike soggy roots. This galvanized steel garden bed is sleek, spacious, and durable. A gorgeous and functional upgrade for any serious gardener.

Best Choice Products 8x4x2ft Outdoor Metal Raised Garden Bed, Deep Root Planter Box for Vegetables, Flowers, Herbs, and Succulents w/ 478 Gallon Capacity – Gray
- 2FT GROWING DEPTH: 24 inches of depth holds up to 478 gallons of soil-ideal for medium to deep rooting plants and vegetables like broccoli, beans, and more. Note: This product does not include a bottom panel
- IDEAL COMPOST BED: An open base combined with ribbed steel makes this the perfect space to layer yard waste, food scraps, and other additives to create enriched soil at home
- TOOL-FREE ASSEMBLY: Beveled steel panels come together with a set of included wingnuts and bolts with rubber edging for your added protection
- BUILT TO LAST: Made with powder-coated steel panels and three stabilizing rods, this garden bed is the perfect, sturdy planter for romaine lettuce, cucumbers, strawberries and other seasonal crops
Assessing Soil Type and Quality
I always begin by assessing the soil type and its quality, as pinto beans thrive in well-drained soil. Avoid heavy, clay-rich soils which retain water, as pinto beans are susceptible to root rot in waterlogged conditions. A loamy soil, which balances sand, silt, and clay, supports optimal water drainage and retention necessary for healthy pinto beans.
Optimizing Soil pH for Pinto Beans
The pH of soil influences bean growth significantly. Pinto beans prefer soil pH levels ranging from 6.0 to 7.0. Testing the pH allows me to adjust it accordingly, often by adding lime to raise pH or sulfur to lower it. Maintaining this optimal pH is crucial as it affects the availability of nutrients in the soil.
Improving Soil with Compost and Organic Matter
Incorporating compost and organic matter into the soil not only improves drainage but also increases fertility. I aim for a balance that provides ample nutrients while promoting good soil structure and moisture retention. Adding compost enhances the growth potential of pinto beans by enriching the soil with essential nutrients and improving soil health overall.
Planting Pinto Beans
In my experience with gardening, I find that precise timing, spacing, and sowing techniques are essential for successfully planting pinto beans. These legumes thrive when given the proper care from the start.
Choosing the Best Planting Time
I always plant my pinto beans after the last spring frost because they require warm soil to germinate effectively. Typically, I wait until the soil temperature reaches at least 60 degrees Fahrenheit, which ensures the seeds won’t rot in cooler conditions. By monitoring the local weather and soil temperatures, I pinpoint the ideal planting time between late spring and early summer to maximize growth potential.
Understanding Proper Spacing
To allow for adequate air circulation and growth, I give each pinto bean plant enough space. I follow the recommended spacing of 4-6 inches apart for individual seeds in rows. Keeping rows around 21-30 inches apart helps prevent overcrowding. This spacing benefits plant health and simplifies walking paths for maintenance and harvesting.
Sowing Techniques for Pinto Beans
When I’m ready to sow pinto beans, I make sure to plant the seeds directly into the garden soil because they do not transplant well. I place each seed about 1-2 inches deep, with the ‘eye’ facing down. By doing so, I ensure that they have the optimal depth to anchor themselves and access soil moisture. Sowing directly also taps into the benefits of planting in an area with full sun, which promotes strong and healthy growth.
Caring for Pinto Bean Plants
When growing pinto beans, I focus on proper watering, mulching, and fertilization to ensure healthy growth and optimal yields. My intention is to share techniques that have consistently worked in my experience.
Watering Strategies for Optimal Growth
Pinto bean plants require consistent moisture, especially during flowering and pod formation. I typically provide 1 inch of water per week, but during hotter periods, I increase the frequency to maintain the moisture level without waterlogging the soil. It’s crucial to water deeply and less often to encourage the roots to grow downward, seeking moisture and nutrients.
Make watering your pinto bean patch a breeze with this premium soaker hose! It delivers consistent moisture right at the root zone—no waste, no stress. Perfect for gardeners who want thriving plants without the daily watering hassle. It’s one of my favorite time-saving tools for a lush and productive garden.

Melnor Flat Soaker Garden Hose; 50 ft.
- Backed by a Melnor 2-Year Limited . Melnor stands behind its products. Need additional information or assistance? Leave a question/feedback below. We value your experience with us.
- Flattens for easy storage – the compact design dripper only takes up About 0. 05 ft³
- Extremely flexible and versatile – it gets water right where you want it! You can place it above ground or under a thin layer of soil or mulch. The porous hose delivers soft and gentle watering with no waste. It’s perfect for raised beds and vegetables!
- Easy connection – included rust-resistant end cap allows multiple hoses to be connected together
Using Mulch to Retain Moisture
Applying a layer of organic mulch around the pinto bean plants has multiple benefits. It helps retain soil moisture, suppresses weeds, and keeps the soil temperature stable. I apply a 2-3 inch layer of straw or grass clippings around my plants. This practice has proven essential in both conserving water and providing a gradual influx of nutrients as the mulch breaks down.
Managing Nutrient Requirements with Fertilization
Pinto beans are not heavy feeders, but they do benefit from the right balance of nutrients. I have found that a light application of a low-nitrogen or balanced fertilizer at planting sets the stage for strong growth. However, excessive nitrogen can lead to lush foliage at the expense of pod development. Therefore, I fertilize sparingly and rely on soil tests to guide my applications, ensuring that my pinto beans receive the care they need without encouraging an overabundance of foliage.
Monitoring and Protecting from Pests and Diseases

In my experience, the key to thriving pinto beans is vigilant protection against pests and diseases which commonly afflict these plants. I’ll guide you through identifying common pests as well as the necessary steps for effective disease control.
Identifying Common Pests
Aphids and mites, including spider mites, are frequent nuisances in pinto bean cultivation. I check for aphids on the undersides of leaves, looking for small, pear-shaped insects that may be green, yellow, or black. For spider mites, I look for tiny red or yellow dots and the fine webs they weave on plants. Another pest to watch for is the Mexican bean beetle, resembling a ladybug but significantly more harmful. Its larvae and adults can skeletonize leaves, severely damaging crops.
- Aphids: Green, yellow, or black insects under leaves.
- Spider Mites: Red or yellow dots with fine webs.
- Mexican Bean Beetle: Yellow-orange beetles with black spots.
To combat these pests, I apply direct streams of water for mite removal or use natural predators like ladybugs for aphids. In severe cases, I might consider using appropriate insecticides.
Effective Disease Control Measures
Pinto beans are also susceptible to fungal diseases and bacterial blight. Fungal infections often manifest as rust, identified by the orange, powdery spots it forms on the leaves. For bacterial blight, I look out for water-soaked spots on leaves, which turn into brown, papery lesions. To address these issues, I make sure to:
- Rotate crops to prevent disease carryover.
- Water at the base to keep foliage dry.
- Remove and dispose of infected plants promptly.
To aid in fungal and bacterial disease management, I often turn to fungicides and bactericides. When chosen wisely, they help control the spread effectively, allowing for healthy growth and harvest.
Supporting Plants
When I grow pinto beans, I always consider how to best support the plants throughout their lifecycle. Choosing the right variety and providing the necessary support structure can greatly influence their productivity and ease of harvest.
Choosing Between Bush and Pole Varieties
My experience has shown that bush beans are compact and tend to support themselves, often making them suitable for smaller spaces or containers. However, they also generally have a shorter growing season. On the other hand, pole beans require more space and need support structures but will produce beans over a longer period.
Staking and Supporting Pole Beans
To successfully grow pole beans, I’ve learned that sturdy staking is essential. I tend to use tall stakes or a trellis at least 6 feet high, which allows the beans to climb naturally. This not only maximizes space in my garden but also facilitates airflow and sunlight penetration, leading to a healthier crop.
The Harvesting Process
Harvesting pinto beans is a straightforward procedure, but it requires precise timing and proper techniques to ensure the beans are at their best quality. I’ll go over the key aspects, including recognizing the right time for harvest, the methods used during harvesting, and the best practices for storing pinto beans.
Knowing the Right Time to Harvest
To make sure I’m harvesting pinto beans at their peak for optimal flavor and nutrition, I watch for the pods to mature. This typically happens when they turn a yellow-brown color and the beans inside feel firm to the touch. Each pod should be picked before it dries out completely or splits open, which can lead to a loss of beans.
Techniques for Harvesting Pinto Beans
When it’s time to harvest, I use a gentle hand. I pick the beans carefully to avoid damaging the plant and the pods because rough handling can cause the beans to bruise. If I’m dealing with a large crop, I may use a greater force to remove the pods from the bush or vine. Then, I place them in a basket or a sturdy container as I gather.
Ready to harvest like a pro? This vintage-style harvesting bag is as beautiful as it is practical. Designed to keep your freshly picked beans safe and undamaged, it’s comfortable to wear and easy to clean. Perfect for those joyful harvest days when your garden is bursting with rewards!
Barebones Harvesting and Gathering Bag – Foraging, Harvest and Fruit Picking Bag with Convertible Straps – Water-Resistant Waxed Canvas Gardening Tool(Slate Gray)
- Durable Foraging Bag: Crafted from high-quality materials, this garden bag is designed for durability, ensuring it withstands the rigors of outdoor activities
- Spacious Design: With a generous interior capacity, this harvesting basket provides ample space for collecting fruits, vegetables, or other harvests, making it an essential tool for gardeners, foragers, and outdoor enthusiasts
- Comfortable Carrying: The adjustable shoulder strap ensures comfortable carrying, allowing you to easily gather your harvest. This garden tool bag is designed for practicality without compromising on style
- Multi-Purpose Use: Versatile for various outdoor activities, from a mushroom bag to a hiking or beach bag, this garden tote is the perfect companion for those who appreciate the beauty of the outdoors and sustainable living
Storing for Longevity
After harvesting, it is crucial to dry the pinto beans thoroughly. A cool, dry place is the best environment for this process. To store my beans for long-term use, I ensure they are completely dried and then seal them in airtight containers to prevent moisture from leading to mold or spoilage. This method helps maintain their quality and extend their shelf life.
Frequently Asked Questions
In this section, I cover some of the most common queries about growing pinto beans, addressing everything from ideal conditions to recognizing a thriving plant.
What are the ideal conditions for growing pinto beans in containers?
When growing pinto beans in containers, I ensure the soil temperature is around 60 degrees F before planting. I use large pots and make sure they have good drainage. Pinto beans need full sunlight and warm weather to flourish.
How do I properly grow pinto beans from seeds?
To grow pinto beans from seeds, I plant the seeds 1-2 inches deep with the eye facing downward. I space the seeds 4-6 inches apart in rows that are at least 21-30 inches apart, ensuring ample room for growth.
What is the typical growth cycle duration for pinto beans?
The growth cycle for pinto beans typically spans between 90 to 150 days, depending on weather conditions and care. I observe the beans transitioning from flowering to pod formation during this time.
Do pinto bean plants require support structures like a trellis?
Yes, pinto bean plants require support, especially if they are pole varieties. I provide a trellis or similar support system for the vines to climb on, ensuring stable growth and easier harvesting.
Is it possible to grow pinto beans using beans purchased from a grocery store?
It’s possible, but not always recommended, to grow pinto beans using beans purchased from a grocery store. These beans may be treated for longer shelf life and could have lower germination rates. I prefer to use seeds from garden centers or seed catalogs that are intended for planting.
What are the characteristics of a healthy pinto bean plant?
A healthy pinto bean plant displays bright green leaves, sturdy stems, and consistent pod development. Lack of yellowing or wilting indicates that the plant is well-nourished and free from pests or diseases.

*We may earn a commission for purchases made using our links. Please see our disclosure to learn more.


