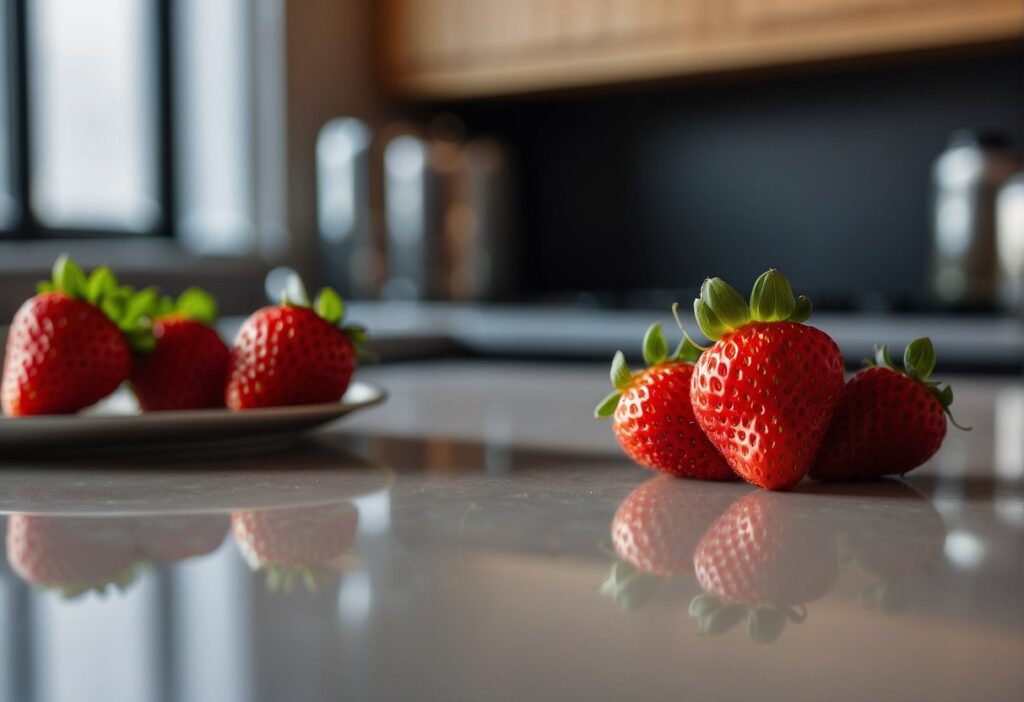
Imagine this scenario. It’s the heart of winter. You’re yearning for the sweet flavor of fresh strawberries. However, strawberry season is still a few months away. The ones at the store just don’t taste the same. This is where canned strawberries step in – a practical way to savor the essence of summer throughout the year!
As someone who writes about foods, I’m always searching for ways to preserve the freshness of fruits and vegetables, and canning strawberries has swiftly become one of my preferred techniques. Not only does it enable me to stock up on these red berries when they’re at their best but it also unlocks a realm of opportunities for incorporating them into my cherished recipes.
If you’re new to canning or have never ventured into canning strawberries, fret not – the process is simpler than you may imagine! With a touch of patience and some fundamental tools, you’ll soon relish in the flavor of canned strawberries. In this article, I’ll share a guide on how to can strawberries at home covering everything from selecting the finest berries to processing and preserving them for optimal taste and storage. Whether you’re a canner or just starting out, there’s information here for everyone.

This kit is great for beginners. We’ve got you covered with the all in one Canning Pot with Rack and complete Set + ½ Pint ladle Measuring Cups by Supa Ant.
This package provides everything you need to kickstart your canning journey at home including a durable Porcelain enamel surface pot with a steel core that’s both lightweight and dishwasher safe. It also comes equipped with tools such, as a canning funnel, jar lifter, bubble popper, magnetic lid lifter, jar wrench, canning tongs and a set of Homemade” labels to add your own touch to your creations.
So put on your apron. Let’s explore the realm of preserved strawberries together! I assure you, your palate (and pantry) will be delighted.
Preparing the Strawberries
Now that you’re all set to begin your canning adventure, let’s kick things off with the first step – preparing your strawberries. Like with any preservation project, using top-notch ingredients is essential – opt for unblemished berries for the best outcome.

Washing and hulling the strawberries
To start off, give your strawberries a rinse under running water to remove any dirt or residue. Once clean, it’s time to hull the berries, which involves removing the stem and leafy green top. I’ve found that using a paring knife or a specialized strawberry huller makes this task quick and easy.
Adding Sugar to the Strawberries
Now comes the intriguing part – sweetening your strawberries with sugar. The quantity of sugar you decide to use is completely your choice – I usually opt for between half a cup and three quarters of a cup for every 3 pounds of berries depending on how sweet I want the final outcome to be. Remember, sugar isn’t about sweetness. It also plays a role in coaxing out the juices from the strawberries resulting in a delectable syrup in your jars. I like to use date sugar as a healthy alternative to sugar but you can also use maple syrup.
After adding the sugar gently mix the berries to ensure they are coated evenly. Then allow them to sit and do their thing. I suggest refrigerating your sugared strawberries for 6 hours or even, up to 12 hours if time permits. The longer they rest, the more juice they will release. Leading to a tastier end result.
I understand the urge to hurry through this stage. Believe me – patience pays off! Allowing your strawberries time to macerate in the sugar helps them soften and develop a intricate flavor profile. Additionally, it simplifies the canning process itself as you’ll have liquid when filling up your jars.
Letting the Strawberries Sit
As your strawberries chill in the fridge, take a moment to relax and give yourself a pat on the back – you’re well on your way to making a batch of canned strawberries that will bring joy to your meals for months ahead!
Canning Process
After letting the strawberries sit and release their juices, it’s time for the next step – the canning process. This is where the magic happens turning your berries into lasting treats that you can savor throughout the year.
Heating the Strawberries
Begin by putting your macerated strawberries in a pot and gently heating them over heat until they start simmering. It may be tempting to add some liquid. Hold off on that temptation! The strawberries will naturally release juice creating a syrup that helps maintain their texture and taste.
Sterilizing the Jars
While the strawberries are warming up, it’s essential to sterilize your jars. Don’t skip this step – ensuring that your canned strawberries are safe to eat without any bacteria is key. Simply place the jars in a pot of boiling water for 10 minutes to sterilize them.
Filling the Jars
After sterilizing your jars and simmering the strawberries, it’s time to fill them up! I like using a wide-mouth funnel for a less messy process – spoon the hot strawberries and syrup into each jar leaving about an inch of space at the top. For an extra touch, you can use chopsticks to arrange the strawberries in the jar making sure they’re evenly spread out and not too tightly packed.

You can also opt to add a tablespoon of lemon juice to each jar at this stage. While not necessary, I personally find that it enhances the flavor of the strawberries and gives a tang to the product.
Sealing the Jars
Once filled, it’s essential to wipe the rims clean with a paper towel or damp cloth. This step ensures sealing of the lids and prevents any potential bacteria from getting in. Lastly, place the lids and rings on top of each jar. Screw them on until snug. Remember not to tighten them too much!
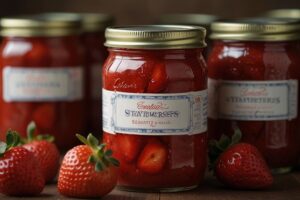
And there you have it – your strawberries are all set for processing, turning into canned treats.
In the following section we will discuss the stages of the canning process which involve processing times and tips for storage. Prepare to be impressed by how simple and fulfilling it can be to make your own canned strawberries right in your kitchen!
Using Canned Strawberries
Now that you have a batch of canned strawberries, you may be curious about their longevity and various uses. I have news on both fronts!
Shelf Life of up to a Couple of Years
Let’s start with shelf life. When properly canned and stored, your strawberries can remain fresh for up to a couple of years without compromising their taste or texture. This means you can savor the essence of summer during the winter days – opening a jar of sweet syrupy strawberries while snowflakes dance outside is truly a special moment.

However, the real excitement begins when it comes to incorporating your canned strawberries into a myriad of recipes. The culinary possibilities are boundless. I am always astounded by how adaptable these vibrant red fruits can be.
Various Uses
One of my all-time preferred ways to enjoy canned strawberries is in a strawberry shortcake. The luscious berries harmonize beautifully with tender biscuits and a dollop of whipped cream resulting in a dessert that evokes nostalgia while offering indulgence.
If you’re feeling a bit fancy, you could get creative. Use your preserved strawberries to whip up a strawberry sauce or glaze for drizzling over your dish.
Meal Options
Why limit yourself to desserts? Preserved strawberries work wonders in breakfast options like pancakes, waffles and even oatmeal. Picture waking up to a stack of pancakes adorned with a dollop of warm syrupy strawberries – now that’s a breakfast worth jumping out of bed for!
Let’s not overlook the array of treats you can create with your preserved strawberries. From cheesecakes and ice cream to muffins and cakes, these versatile berries can infuse any dessert with a burst of fruity goodness. You can also use them to craft jams and jellies perfect for gifting to loved ones (if you can bear to part with them!).

One thing I particularly love about preserved strawberries is how they allow me to savor the taste of summer throughout the year without having to rely on off-season (and often bland) berries. It’s such a feeling to be able to reach into your pantry and grab a jar of sweet strawberries whenever you feel like it – and the fact that you made them yourself just adds to their flavor.
Feel free to get creative with your preserved strawberries – the possibilities are endless!. If you happen to have a jar or two, don’t hesitate to share them with your loved ones. They’ll surely be asking for your recipe before you know it.
The Joys and Benefits of Canning Strawberries at Home
In summary, preserving strawberries at home is a fun, satisfying and tasty way to enjoy summer flavors all year long. By following the steps provided in this guide, you can whip up a batch of syrupy berries that will enhance dishes with their fruity goodness.
From washing and hulling the berries to processing and storing the jars, canning strawberries is truly a labor of love. But the end result is truly rewarding – not only will your pantry be stocked with strawberries but you’ll also take pride in creating them yourself using simple ingredients.
Being a food blogger who focuses on nutrition, I always seek ways to add seasonal fruits and vegetables to my meals. Canning is a method I adore for achieving this goal. It not only lets me savor the flavors of summer beyond its time but aids in reducing food wastage and cutting costs on off-season produce.

The beauty of canning strawberries lies in its connection to a timeless tradition of preserving food. For ages, home chefs have used this technique to craft tasty, lasting treats that nourish their loved ones and bring happiness to their tables. Embracing this heritage fills me with pride and links me to the past, fostering an appreciation for the pure genuine taste of seasonal fruits.
Whether you’re a canner or new to the craft, I hope this guide motivates you to experiment with canning strawberries. Trust me, once you relish the berries soaked in syrup and feel the joy of making your preserves, you’ll be captivated!
And who knows – perhaps it will spark your interest in preserving fruits and veggies. The realm of home preservation offers an array of options with delights waiting to be explored. Feel free to dive into preparing your stash of preserved strawberries. Your self (and your taste buds) will be grateful. And remember, enjoy the process of preserving!
*We may earn a commission for purchases made using our links. Please see our disclosure to learn more.